DropMail-instellingen

Benjamin Kluge
Gemaakt: 18.01.2021 9:18 - Bijgewerkt: 27.02.2021 3:07
DropMail - your custom email address
With DropMail you get your personal email address, to which you can send necessary documents anytime and anywhere and thus automatically store them in PaperOffice.
Please note: DropMail is the module integrated in the PaperOffice 2020 version and part of the PaperOffice Plus Online Services. To use PaperOffice Online Service you need the latest release for compatibility reasons.
Archive documents by simply forwarding them to your personal DropMail address. Regardless of whether you forward a photo from your mobile phone, for example, or automated scripts use this email address: all email attachments are archived according to your specifications.
Please note: Forwarding a forwarding (example: you set up forwarding in your Outlook from an existing email address) is not allowed for security reasons. Direct messages will be sent to your DropMail address without any problems, forwardings will not
DropMail Settings
Enter any email address you want to use later in front of the domain name @ paperoffice-mail.com on the left. You must observe the minimum length of 10 characters and permitted characters such as a-z, 0-9, -, _. Such as mycompany@paperoffice-mail.com

Click on the button next to it labeled "Check Availability" to check the availability of this email address.
If the page you want is available, a green message "Successful" will appear below - which means that you can use this address.

In the event that the message "Error: DropMail email address cannot be used" is displayed, the address you entered cannot be used. Enter another and try again.

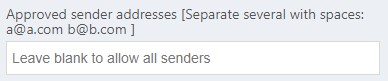
Approved sender addresses
Store those sender addresses that you do not want to allow. Separate them with a space. If you would like to receive emails from all senders, please leave this field empty.
Password in subject is required
Enter a password in the next field, which is required in the subject. The sender must send this password with the email to the DropMail address so that you can receive it.
Approved file formats
Specify here which file formats you want to allow. You can choose “All file formats supported by PaperOffice”, or the following combinations, such as only “PDF”, “PDF, TIF, JPG, PNG”, or “PDF, TIF, JPG, PNG, TXT, DOC, DOCX, XLS, XLSX " allow.
Maximum file size
Select the maximum permissible file size for the uploads here.
Before you save your details and carry out the test run of the DropMail address you just saved, it is important that you define the storage mask as the next step for this address.
Filing mask: PaperOffice Intelligent Filing (PIA)
The PIA module integrated in PaperOffice helps you with the automated processing of your files. As a next step you can define the storage method for your DropMail address:
- Show storage dialog: New documents are analyzed by PIA, automatically tagged and displayed for completion.

- Only if unknown: As "Show storage dialog", but the PIA storage dialog is only displayed if the document could not be recognized.
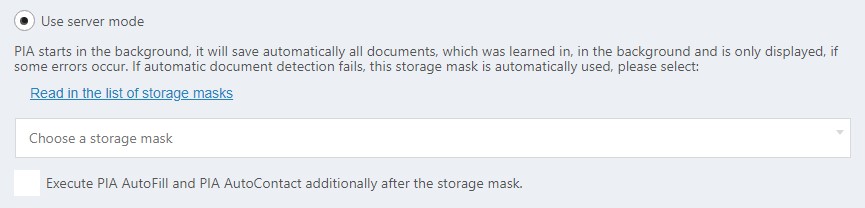
- Never show: PIA is started in the background, automatically stores all documents in the background and is only displayed in the event of errors. Activate the radio button if you want to use a specific storage mask for your DropMail and select the necessary storage mask from the list as the next step.
- Switched off and optimized for mass imports: PIA is not used and new documents are stored directly in the target folder without analysis. Activate the radio button and, as the next step, select a specific folder for storage by clicking on the "Select from folder list" button.
Now select the folder directly in the folder tree and click on it with the left mouse button.
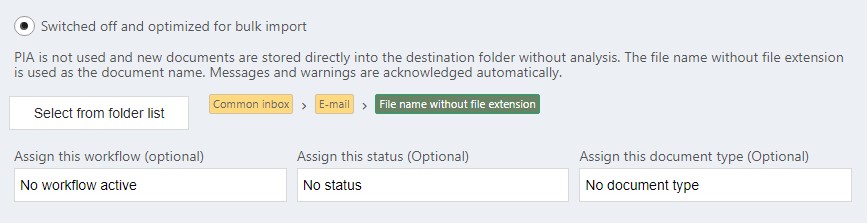
Assign workflow : In addition to the standard folder from the previous step, you can also assign a workflow. This workflow is activated automatically as soon as the document is stored in the folder. This assignment is optional.
Assign status : Assign status: Activate this option if you want to automatically assign a document type by selecting it from the selection list. The status can only be assigned if you did not select a workflow in the previous step or if the workflow you selected does not contain an automatic action, such as the assignment of a document status. This assignment is optional.
Assign document type : Activate this option if you want to automatically assign a document type by selecting it in the selection list.
Enter a name for the monitoring
Now enter the name for the DropMail monitoring. The designation is shown to you in the previous table when listing all of your existing intelligent monitoring systems.
Test the DropMail connection
Scroll up again until you hit the button labeled "Test DropMail Connection: Retrieve the first available email, process attachments and delete". Click on this and save your page on the next prompt.
Activate DropMail address
Your DropMail address is not active and cannot be used until you check the box under the name "Monitoring activated". Set the check mark with the left mouse button. If you want to deactivate your DropMail address later or set it to inactive, remove the checkmark.

This concludes your settings for your custom address. You still need to add this address by clicking “Add”.